If you want to bring the joy and magic of the movies to the comfort of your own home, then setting up a fixed frame projector screen is key to recreating the big screen experience.
When properly installed, a fixed frame projector screen is the perfect centerpiece for your home theater. It's a great way to make the most out of your projector by providing a larger, more immersive viewing experience, with a ton of intuitive settings and features.
But what exactly is a fixed frame projector screen and how can you install it properly at home?
If you aren't familiar with the process, then we've got you covered! From the advantages of fixed frame projector screens to some helpful product recommendations from WEMAX—we'll walk you through this simple step-by-step guide to ensure your installation is easy and efficient.
What Is A Fixed Frame Projector Screen?

A fixed frame projector screen is a projector screen that's mounted straight to the wall in a fixed position—just like a picture frame or a blackboard.
Compared to traditional projector screens (like a ceiling or floor projector screen that you can roll up and down), a fixed-frame projector screen is permanently attached to the wall even when not in use.
READ MORE: Fixed Frame Projector vs. Pull Down Screen: Which Is Better?
Some of the advantages of a fixed-frame projector screen include:
1. Fixed frame projector screens are more convenient to use
Fixed frame projector screens are the best option for rooms intended specifically for viewing, like home theaters, classrooms, and conference rooms, because they're conveniently available for use at any time—no need for any complicated setups since they're already attached to the wall.
2. Fixed frame projector screens provide better picture quality
These screens offer projectors the greatest amount of uniform tension on the screen surface, ensuring a completely flat canvas to provide the most optimal and faithful image quality. It gives you a similar experience to a wall-mounted TV that you’re used to with even better picture quality, especially if you’re using a laser projector.
3. Fixed frame projector screens recreate the big screen experience
A fixed frame projector screen is rigid enough to maintain its positioning and geometry exactly like in the case of a real theater screen. Take the big screen experience right at your doorstep with a fixed frame screen.
4. Fixed frame projector screens make great centerpieces for home theaters
Because of their permanent placement, fixed frame projector screens make a great focal point for a room that the rest of the interior design can work around it. They come in many different sizes, with varied widths and colored border options to meet different needs.
5. Fixed frame projector screens last longer
You can also expect fixed frame screens to have exceptional longevity because they don't require constant adjustments while being used. Fewer adjustments, and less room for damage, so rest assured your fixed frame screen lasts longer.
WEMAX Fixed Frame Projector Screens

Need some help in choosing a projector screen for your home theater needs? Check out this top-notch lineup of fixed frame projector screens from WEMAX:
1. 100-inch ALR and CLR UST Fixed Frame Projector Screen
This 100” ALR & CLR UST Fixed Frame Projector Screen is the ultimate combination of large and efficient—not only do you get a huge screen size at 100 inches, but you also get an increased aspect ratio at 16:9.
Its standout feature is its lightweight but sturdy aluminum frame that's built to be ultra-thin with narrow edges that give it an even wider appearance for a more immersive viewing experience. Like most models from WEMAX, it comes ready for both 4K and 3D viewing.
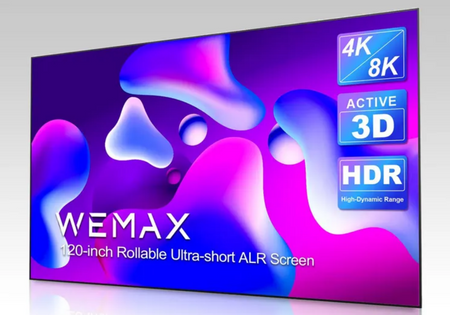
2. 120-inch ALR and CLR UST Fixed Frame Projector Screen
With a sleek design and premium features, this 120” ALR & CLR UST Fixed Frame Projector Screen gives you a larger screen size against a lightweight frame.
It features ceiling light rejecting (CLR) technology that blocks off up to 90% of ambient light to provide you with brighter images and deeper contrast, perfect for enjoying your favorite movies even in a well-lit room.
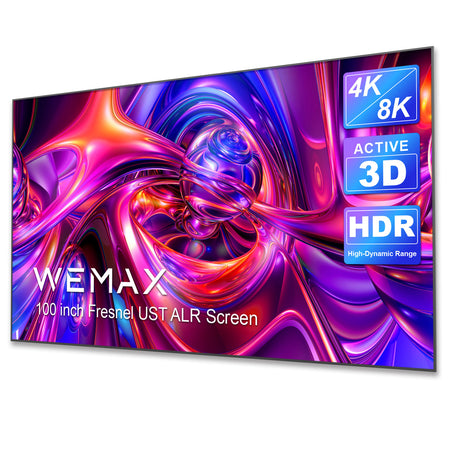
3. 100-inch Fresnel ALR and CLR 1.0 Gain Fixed Frame Projector Screen PSF01
Featuring advanced Fresnel lens optical technology, the 100” Fresnel ALR and CLR Fixed Frame Projector Screen effectively directs incident light from a laser projector while rejecting ambient light from external sources in the room to create true-to-life images—the perfect pair for your ultra-short throw projector.
Brightness is the name of the game with this projector screen, as it stands out as having a peak gain of 1.0, making it 20% brighter than most screens on the market today. Viewing quality is enhanced with spring tension for a precise and ultra-flat surface for a truly immersive visual experience.
How To Install WEMAX Fixed Frame Projector Screens

Here's the real deal: if you don't know how to properly install a fixed frame projector screen, then you can't get the most out of it. Here are some easy steps for you to follow when setting up your screen:
1. Pre-installation Preparation
The first step is choosing the right location for your screen. The most important tip to remember is to choose a wall that has no direct light. Remember that the more light hits the screen, the more washed out the images produced. So pay attention to factors like window placement, light fixtures, and other potential sources of ambient light.
After you've chosen a wall, the next thing you need is to decide on the screen height. The recommended space between the bottom of the screen and the floor is between 24 to 36 inches. But if you plan on having multiple seating options, then you can go a bit higher.
Also make sure you have all the tools needed for installation, such as:
- Ladder
- Pencil for marking
- Ruler or measuring tape
- Screws and screwdriver
- Drills
- Mounting brackets
2. Assembly of WEMAX Fixed Frame Projector Screen
The great thing about WEMAX projector screens is that they are incredibly DIY friendly. Each screen comes complete with an installation kit, an easy-to-follow manual, and a professional installation video that any beginner can assemble. So make sure you watch the video and read the instruction manual thoroughly before starting your assembly.
Start out by assembling the aluminum frame face down by laying out all the pieces in their proper placement. Next, slide in the support clips, strips, and corner protectors that are used to hold the screen onto the frame.
Then start attaching the screen to the frame by rolling the screen open and using the correct screws as indicated in the manual to fix it onto the frame.
3. Mounting The Projector Screen
The next step is to install the mounting brackets which will hold the projector screen in place.
Start by positioning the screen level on the spot you've chosen on the wall and temporarily mark the top, bottom, and side edges with a pencil. For drywall installation, use a stud finder to mark the locations of the studs behind the screen.
Drill holes on the spots marked and attach the mounting brackets to the wall using the anchor screws included in your WEMAX installation kit.
4. Hanging The Projector Screen
Once the mounting brackets are in place, the next step is to hang the projector screen onto the wall.
Since you've already assembled your fixed frame projector screen at this point, all that's left to do is simply slide the screen over onto the brackets, starting with the top edge. Re-tighten the screws to make sure the screen is secure and won't fall off.
5. Adjusting The Screen Tension
To adjust the screen tension, the first thing to do is remove the end caps from the screen's case where you will see a spring tension rod. Manually roll the spring until you notice the screen material start to retract and the tension increase.
After achieving the desired tension, return the end cap back onto the screen's case so your screen can resume its normal function.
Additional Tips For Optimal Viewing

1. To enhance the brightness and contrast of your fixed frame projector screen, mount it on a wall or surface that is darker in color than white.
Paint the area surrounding your screen (including sidewalls and ceiling) darker than the rest of the room. This way, you can reduce the reflected light and ultimately enhance your home theater experience.
2. Choose a projector with a high ANSI Lumen rating. Brighter projectors work best with fixed frame screens and you can always adjust to dimmer settings to suit your home theater setup.
3. Pick a projector screen with an aluminum frame. Aluminum frames are easy to install and maintain, while still being lightweight enough for easy transport and display. WEMAX fixed frame projectors got that aluminum
4. If you're having a hard time controlling the light in the room, then consider investing in an ALR screen. ALR screens eliminate the negative effects of ambient light—such as glare and spotlight—that result in washed-out projected images. This results in brighter images with better contrast and resolution.
5. Clean your projector screen regularly to prevent dust build-up and scratches that could ruin your viewing experience. When cleaning your projector screen, make sure to use a microfiber cloth and gently wipe from side to side to prevent scratching the surface. Never scrub or apply unnecessary pressure.
Frequently Asked Questions (FAQS)
1. How long does it take to install a WEMAX fixed frame projector screen?
Fixed frame projector screens are a lot easier and faster to install compared to other screens. From assembly to mounting, the entire process will take only a few hours if done properly.
2. Can I install the projector screen myself or do I need professional help?
The great thing about WEMAX projector screens is that they are incredibly DIY-friendly so you can do it all by yourself.
Each screen comes complete with an installation kit, an easy-to-follow manual, and a professional installation video that any beginner can assemble. So make sure you watch the video and read the instruction manual thoroughly before starting your installation.
3. How do I adjust the screen tension?
To adjust the screen tension, the first thing to do is remove the end caps from the screen's case where you will see a spring tension rod. Manually roll the spring until you notice the screen material start to retract and the tension increase.
After achieving the desired tension, return the end cap back onto the screen's case so your screen can resume its normal function.
4. What do I do if my projector isn't displaying properly?
If no image is appearing on your projector screen, check the status light to confirm the projector is operating normally or press the "blank" button on the remote control to see if the image was temporarily turned off. Make sure that all necessary cables are securely connected. If all else fails, try connecting the video source directly to the projector screen.
If an image is displayed but is distorted, the angles of your projector against the screen are most likely out of balance. Physically adjust the lens so the projector is at either a higher or lower angle, or you can try tilting the projector itself.
Wrapping It Up
If you want to get the cinematic experience from the comfort of your home, then fixed frame projector screens are your best bet. These screens are mounted straight to the wall in a fixed position, providing a permanent flat surface for all your home theater needs. When properly installed, they provide excellent picture quality for an optimal viewing experience.
By following this easy step-by-step guide, you can install a fixed frame projector screen by yourself safely and efficiently. And if you need help in choosing a fixed frame projector screen, WEMAX is your one-stop shop for all your visual application needs.
WEMAX is the leading brand for laser projectors, portable projectors, LED projectors, and projector screens of all sizes that provide a real home theater experience. If you want to know more about making the most out of your home theater, be sure to sign up for the WEMAX newsletter for more tips, how-tos, and exclusive deals.
Related Blogs from WEMAX
11 Best Projector Screen Materials For Home Viewing
Step-by-Step Guide: How To Install Your New Electric Projector Screen
What Activities Do I Need To Get With A Home Projector?
Be the first to know the latest updates, tips, how-tos, exclusive deals, and discounts from WEMAX. Sign up for our newsletter today!


Comments (0)
Back to Tips and Tricks